Commercial LED strip lights can make a warehouse aisle clearer, a retail shelf more inviting, or a workbench safer to use. But a bright strip is not automatically the right strip. Buyers must weigh output, color quality, voltage, operating environment, control options, and installation details. A small mismatch can leave visible dots on a display, uneven light beneath a cabinet, or a driver working harder than expected.
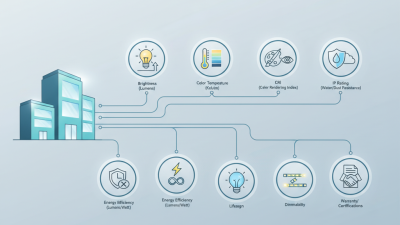
Lighting designer James Benya’s work offers a useful principle: choose lighting for the task, then assess it in its actual setting. That means looking beyond a product photo. Check the strip’s lumen output per meter, color temperature, CRI, beam appearance, and compatibility with its power supply and controls. Measure the run. Consider heat, dust, moisture, and access for maintenance. Details matter.
Some choices seem minor. They aren’t.
This guide presents ten practical tips for comparing commercial LED strip lights before purchase. It covers application, brightness, color quality, construction, dimming, installation, and long-term upkeep. A sample strip should be tested in place when possible; surface color and nearby materials can change the result. Still, specifications cannot predict every visual outcome, and budgets are real. Use the checklist to ask better questions, compare products on consistent criteria, and identify trade-offs before they become costly rework. One limitation deserves attention: a product’s headline rating alone cannot confirm how well an installation will perform. Verify the details with the supplier and installer.
Commercial LED strips serve different tasks, even when they look similar on a specification sheet. SMD strips use visible individual diodes and suit shelf edges, display cases, and task lighting. COB strips create a smoother line of light, useful beneath counters or in coves where reflections reveal individual dots. High-density versions can also reduce spotting through diffusers. Small details matter. Check the datasheet for lumens per metre, colour temperature, colour-rendering index, and rated life—not just watts.
For long runs in retail aisles or hospitality spaces, confirm voltage drop and feed-point requirements with a qualified installer. A strip that dims near its far end can make a clean installation look uneven. Damp kitchens, wash-down areas, and outdoor signs need suitable ingress protection; the rating must match the actual exposure. The IEA’s Energy Efficiency 2023 report estimates that lighting accounts for about 15% of global electricity use, making operating hours and controls worth considering. Dimming can help, but only when the strip, driver, and control system are compatible. Still, the highest output is not always the best choice. Glare on polished shelves is easy to overlook. Check the datasheet, then test a short sample in the real space.
Begin with the surface you need to light, not the brightest strip on a supplier’s chart. Lumens per metre describe light output, but they do not tell you how much reaches a counter or workbench. Measure the area, note the mounting height, and consider whether a diffuser or shelf will block light. Measure the surface. For detailed tasks, check the target illuminance against a lighting standard suited to the space, then test a sample in place.
Color affects comfort and accuracy. Warm white can make a lounge feel inviting, while neutral or cooler white may suit inspection and preparation areas. Check the correlated color temperature and color rendering index, especially where staff judge paint, food, or fabric. Numbers help, but they are not the whole story. Two strips with similar specifications can look different beside existing fixtures, so compare them at the actual dimming level.
Estimate energy use from watts per metre multiplied by the installed length, then include the driver’s losses. Compare efficacy, or lumens per watt, at the intended brightness rather than relying on maximum output alone. Confirm that the power supply supports the total load and the strip’s dimming method; long runs may also show brightness variation. The first estimate is rarely perfect. A short trial can reveal glare, uneven color, or a power bill you did not expect.
| # | Selection Tip | What to Define | Practical Guidance | What to Check |
|---|---|---|---|---|
| 1 | Set the required brightness | Choose a target illuminance for the work surface, measured in lux. | As a starting point, many general office tasks use around 300–500 lux, while detailed work may need higher levels. Requirements depend on the task and local standards. | Assess the complete lighting layout, including mounting height, spacing, room surfaces, and light lost through diffusers—not just the strip’s lumen rating. |
| 2 | Compare light output per metre | Review delivered lumens per metre (lm/m) alongside watts per metre (W/m). | Output varies widely by strip design. Compare products at the same length and operating conditions rather than treating one lumen-per-metre figure as suitable for every application. | Use the manufacturer’s photometric data where available, and account for channel covers, installation position, and indirect-lighting losses. |
| 3 | Choose the right color temperature | Select correlated color temperature (CCT), measured in kelvins (K). | About 2700–3000 K appears warm; 3500–4000 K is generally neutral; 5000–6500 K appears cooler or more daylight-like. | Consider the space’s purpose, existing lighting, finishes, and user preference. Keep CCT consistent across areas intended to look uniform. |
| 4 | Specify color-rendering quality | Check the Color Rendering Index (CRI), especially for merchandise, food, artwork, or inspection tasks. | CRI 80 or higher is a common baseline for many commercial applications; CRI 90 or higher can be useful when accurate color appearance is important. | For critical color assessment, request relevant color-quality data in addition to CRI, such as R9 or TM-30 metrics. |
| 5 | Plan power and energy use | Calculate connected load and expected operating energy. | Connected load (W) = strip input (W/m) × installed length (m). Estimated energy (kWh) = load (W) × operating hours ÷ 1000. | Include the power supply’s losses in energy estimates, and compare products by useful light output as well as watts. |
| 6 | Match the power supply to the installation | Confirm output voltage, total load, dimming method, and available headroom. | The supply voltage must match the strip. A commonly used design allowance is roughly 20% spare capacity, subject to the product instructions and installation conditions. | Check the supply’s environmental rating, ventilation needs, protection features, and compatibility with the selected controller or dimmer. |
| 7 | Manage voltage drop on long runs | Review the strip’s maximum run length and recommended feed points. | Voltage drop can reduce brightness or cause uneven output, particularly on longer runs. 24 V systems can allow longer runs than comparable 12 V systems, but limits remain product-specific. | Follow the strip’s wiring guidance. Use suitable conductor size and additional power feeds where specified; do not assume one continuous run will perform uniformly. |
| 8 | Select protection for the location | Determine whether the installation is dry, damp, dusty, or exposed to water. | IP20 is generally for dry indoor locations. IP65 is dust-tight and protected against water jets; IP67 covers temporary immersion under defined test conditions. | Match the rating to the actual exposure and check whether cut ends, connectors, and joints retain the intended protection after installation. |
| 9 | Allow for heat management | Check strip power density, ambient temperature, and mounting surface. | LED strips produce heat. An aluminum channel can help conduct heat away and provide mechanical protection, especially for higher-output installations. | Follow the product’s mounting and temperature limits. Avoid enclosing the strip in a way that traps heat unless the assembly is designed for it. |
| 10 | Confirm dimming, controls, and compliance | Define whether the project needs dimming, scheduling, occupancy control, or integration with a building system. | LED strips, power supplies, and controls must use compatible dimming methods. Controls can reduce operating hours or output when lighting demand is lower. | Verify compatibility, local electrical and building-code requirements, and any required safety listings for the complete installed assembly. |
Before ordering commercial LED strip lights, confirm the strip and power supply match: many systems use 12 or 24 volts DC. Multiply the strip’s watts per meter by the planned length, then choose a supply with suitable capacity and ventilation. Do not guess. Long runs may dim near the far end because of voltage drop; split feeds or follow the product’s wiring guidance. Check controller ratings too. A dimmer must match the strip’s voltage, load, and channel type, especially for RGB or tunable-white installations. Controls that seem compatible can still flicker or overheat when current limits are ignored.
At the site, check the strip’s width, cut points, connector type, and mounting surface before installing channels. Small details matter. Aluminum channels can help manage heat and create a straight finish, but check their fit and available space. Match the protection rating to the location; a splash-prone area needs different protection from a dry ceiling. Plan where the power supply and controller will sit, leaving access for service instead of sealing them behind a finished panel. A careful drawing can miss a beam, cabinet lip, or awkward cable route. Measure the actual site, not just the plan.
Commercial LED strip lights often run for long hours, so durability matters as much as brightness. Check the stated operating temperature and expected service life, but treat lifespan figures as estimates, not guarantees. Heat is a common weak point. A strip mounted inside a tight aluminum channel may run hotter than one installed in open air. Look for clear guidance on heat sinking, bend radius, and approved power supplies.
Check the IP rating against the actual location. IP20 may suit a dry indoor display, while damp areas need protection against moisture; outdoor exposure can require protection from both water and dust. The rating applies to the tested product configuration, not every connector or cut end. Small details matter. A poorly sealed joint can undo a weather-resistant jacket.
Review safety marks and supporting documents for the exact strip and driver models. In North America, a recognized testing laboratory’s listing can indicate evaluation against applicable electrical safety standards. A logo alone is not proof; verify the model number in the certifier’s directory. Ask for test reports when claims are unclear. Not always obvious. I would also check wire size, voltage drop, and connector temperature under load; these details are easy to overlook on a product page, yet they affect performance and safe installation.
When choosing commercial LED strip lights, read the warranty beyond its headline term. Check whether it covers the strip, driver, connectors, and labor. A five-year warranty may exclude installation costs or require failed parts to be shipped back. Keep the invoice and installation date with your maintenance records. Small detail. Also confirm whether coverage changes in damp, hot, or enclosed spaces, where heat can shorten component life.
Tip: Ask for warranty conditions in writing, including claim steps, response times, and remedies. Check whether a technician can replace one section without removing a long run. Label circuits and leave access to drivers. This can reduce downtime. Still, maintenance needs are easy to underestimate; one inaccessible driver may mean ceiling work.
Estimate total cost of ownership across the expected service period, not by purchase price alone. Include energy, controls, labor, access equipment, replacement parts, and disposal. Compare wattage at the required light output, not just advertised brightness. Dimming schedules matter, too. A sample installation can help test assumptions before a large order. The estimate will not be perfect. Review it after the first year using actual energy bills and service records.
Illustrative 10-year cost model for three commercial LED strip lighting options.
Model assumptions: 100 metres of lighting operated 12 hours daily for 10 years at $0.15 per kWh. Estimated power loads are 14, 12, and 10 watts per metre, respectively. Purchase and installation, energy, and maintenance or replacement costs are planning estimates in US dollars, not supplier quotes. Warranty terms vary; confirm what is covered, including labor and removal.